Top 10 Cooking Tips for Home Chefs: Mastering the Basics
Essential Knife Skills for Home Chefs
Mastering your chef’s knife is the single most transformative skill in cooking. Great knife skills speed up meal prep, ensure even cooking, and keep you safe in the kitchen. (cooking tips for home chefs)
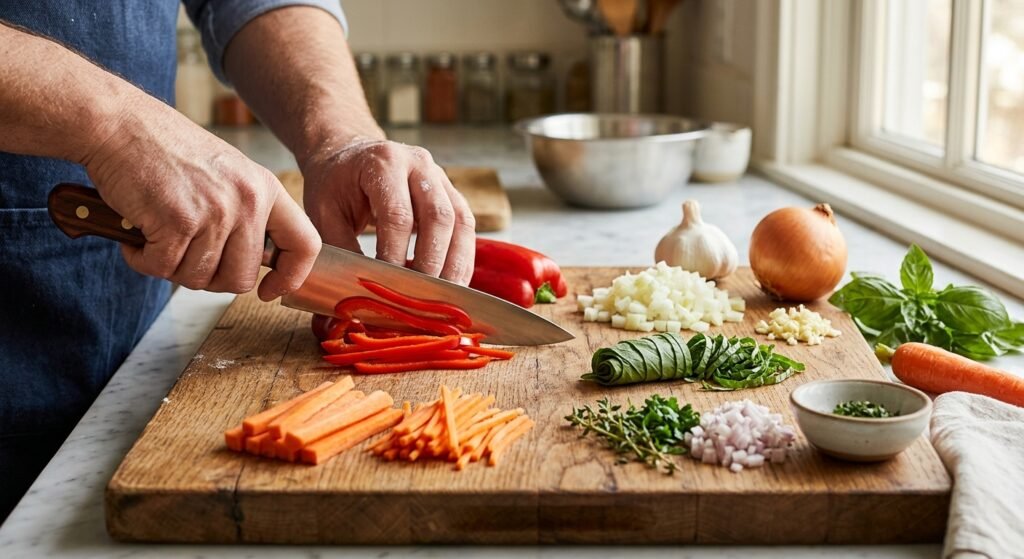
The Proper Grip: The Pinch Grip
- How to execute: Pinch the base of the blade (where it meets the handle) between your thumb and index finger, then wrap your remaining three fingers around the handle.
- Why it matters: Choking up on the blade shifts the center of gravity into your hand, giving you maximum control, stability, and precision.
Hand Placement: The Claw Grip
- How to execute: Curl the fingertips of your non-dominant hand inward toward your palm (like a bear claw) and rest your knuckles against the flat side of the knife blade as a guide.
- Why it matters: This keeps your guide fingers and thumb safely tucked away from the sharp edge at all times.
Key Cut Dimensions Reference
| Cut Name | Description | Target Dimensions | Common Uses |
| Batonnet | Thick stick | 1/4 in X 1/4 in X 2 in | Prep cut for Small Dice, raw vegetable sticks |
| Julienne | Thin matchstick | 1/8 in X 1/8 in X 2 in | Stir-fries, slaws, salad garnishes |
| Medium Dice | Medium cube | 1/2 in X 1/2 in X 1/2 in | Hearty soups, stews, roasted root vegetables |
| Small Dice | Small cube | 1/4 in X 1/4 in X 1/4 in | Mirepoix base, salsas, sauces |
| Brunoise | Fine cube | 1/8 in X 1/8 in X 1/8 in | Fine garnishes, consommés |
| Chiffonade | Thin ribbons | Fine shreds | Basil, mint, spinach, kale |
Understanding Flavors and Seasoning
Exceptional cooking relies on balancing the five fundamental tastes: Salt, Acid, Fat, Sweet, and Umami.
               [ FLAVOR BALANCE WHEEL ]

                     ┌──────────┐
                     │   SALT   │
                     └────┬─────┘
                          │
  ┌──────────┐            │            ┌──────────┐
  │   ACID   ├────────────┼────────────┤   FAT    │
  └──────────┘            │            └──────────┘
                          │
                     ┌────┴─────┘
                     │  SWEET   │
                     └──────────┘
The 5 Essential Taste Pillars
- Salt (The Flavor Enhancer):
- Salt doesn’t just make food salty—it suppresses bitterness, brings out natural sweetness, and amplifies underlying aromas.
- Pro Tip: Season throughout the cooking process (in layers) rather than just at the end. Salt draws out moisture and allows flavors to meld as food heats up.
- Acid (The Brightener):
- When a dish tastes heavy, flat, or muddy, it almost always needs acid. Acid cuts through fat, balances sweetness, and activates salivation.
- Sources: Lemon juice, lime juice, vinegars (sherry, apple cider, red wine), tomatoes, and fermented foods.
- Fat (The Flavor Carrier):
- Fat carries aromatic compounds across the palate and provides richness and mouthfeel.
- Sources: Olive oil, butter, ghee, animal fats, sesame oil, and heavy cream.
- Sweetness (The Softener):
- Sweetness tames excessive heat (spice), tempers harsh acidity, and offsets bitterness.
- Sources: Honey, maple syrup, brown sugar, caramelized onions, or reduced balsamic vinegar.
- Umami (The Savory Depth):
- Umami provides a deep, satisfying, savory quality that rounds out complex dishes.
- Sources: Soy sauce, miso paste, aged cheeses (Parmesan), mushrooms, fish sauce, and tomato paste.
Cooking Techniques Every Home Chef Should Know
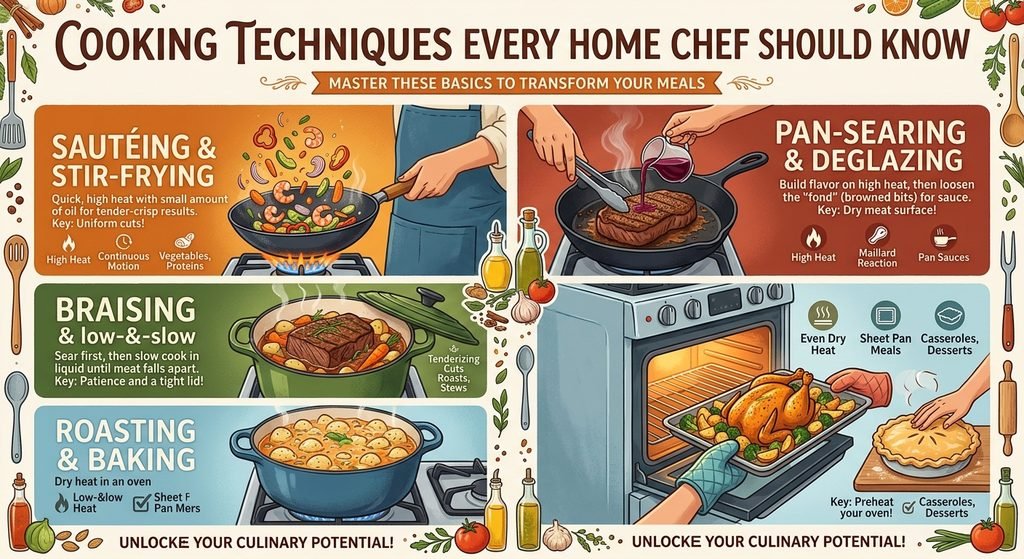
Understanding heat application transforms simple ingredients into restaurant-quality meals. cooking tips for home chefs
A. The Maillard Reaction (Dry Heat & Browning)
The Maillard reaction is the chemical reaction between amino acids and sugars when exposed to high heat.
- Key Steps:
- Dry the protein thoroughly with paper towels (moisture causes steaming instead of browning).
- Heat the pan first, add oil until it shimmers, then introduce the food.
- Leave the ingredient untouched for a few minutes to allow a deep caramelized crust to form.
B. Pan-Searing & Deglazing
- Searing: Cook meat over high heat to achieve a crispy exterior, then lower the heat or transfer to an oven to finish cooking internally.
- Deglazing: Don’t scrub away the browned bits stuck to the bottom of the pan (the fond). Pour in a liquid (wine, stock, or lemon juice) over medium heat and scrape up the bits with a wooden spoon to form a rich pan sauce.
C. Braising (Low & Slow Moist Heat)
Braising is ideal for tough cuts of meat (such as chuck roast or pork shoulder).
- Sear the protein on high heat to develop surface flavor.
- Add aromatics (onions, garlic, herbs) and deglaze the pan.
- Submerge the protein halfway in liquid, cover tightly, and simmer at a low heat ($275^\circ\text{F} – 325^\circ\text{F} / 135^\circ\text{C} – 160^\circ\text{C}$) for several hours until tender.
Meal Prep and Planning for Success
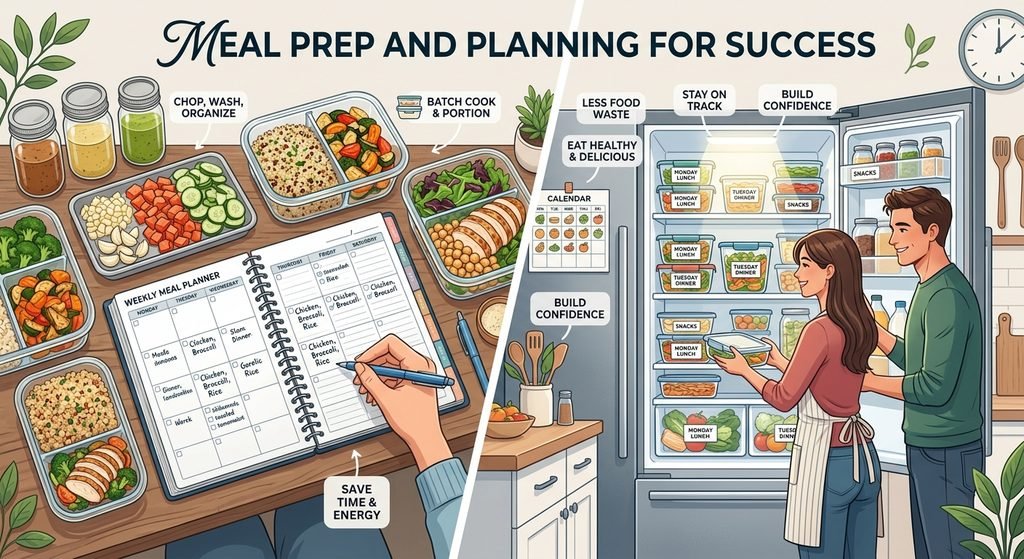
Efficiency in the kitchen starts before you turn on the stove. Good planning reduces waste, saves money, and lowers daily cooking stress.
       [ 4-STEP MEAL PREP WORKFLOW ]

 ┌──────────────┐     ┌──────────────┐
 │  1. PLAN     │ ──> │  2. INVENTORY│
 │ Weekly menu  │     │ Pantry check │
 └──────────────┘     └──────────────┘
                             │
                             ▼
 ┌──────────────┐     ┌──────────────┐
 │  4. EXECUTE  │ <── │  3. PREP     │
 │ Batch cook   │     │ Wash & Chop  │
 └──────────────┘     └──────────────┘
Essential Prep & Workflow Rules
- Embrace Mise en Place: French for “everything in its place.” Chop all vegetables, measure liquids, and portion spices into small bowls before lighting any burner.
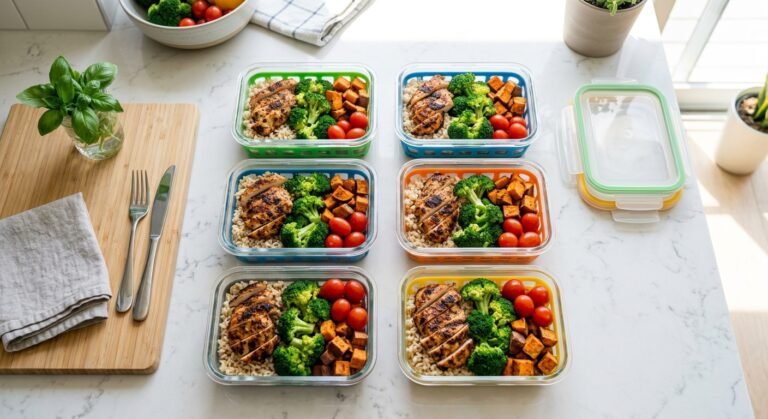
- Batch Prep Components, Not Just Whole Meals: Instead of pre-cooking 5 identical containers, prep versatile building blocks:
- Roasting a large sheet tray of mixed seasonal vegetables.
- Cooking a grain base (quinoa, brown rice, farro).
- Preparing two distinct sauces or dressings (e.g., a lemon-tahini dressing and a chimichurri).
- Proper Food Storage & Safety:
- Label leftovers with masking tape and the date.
- Store cooked proteins and cooked grains for up to 3 to 4 days in the refrigerator.
- Use the FIFO rule (First In, First Out) when organizing your pantry and fridge to minimize food waste.
“cooking tips for home chefs”
One Comment